Interaction with “representations” on a whiteboard canvas can trigger learning processes. This has been extensively observed and documented in child development, but exists across age groups, including adults!
In order to understand how cutting-edge collaborative whiteboards support cognition, one only needs to consider childhood and observe how thinking evolves during play.
Imagine a two-year-old manipulating physical blocks. While playing, the young brain builds up mental constructs of independent objects. These are created stage by stage, integrating elementary action schemes gained from actual experiences within the environment. This is how things like tower-building can happen.
Soon after the assimilated concepts are accommodated in brain structures, it becomes possible for the child to use “abstractions” to think through actions without the need to physically manipulate objects. This is essentially where most adults are — we have a good understanding of how wooden blocks work.
The canvas of a digital whiteboard (a virtual space) makes it easy to represent real objects with pictures or other forms, such as symbols or drawings, while not being constrained by the real environment (a physical space). These brings us to what are called “first-order representations”.
First-order representations
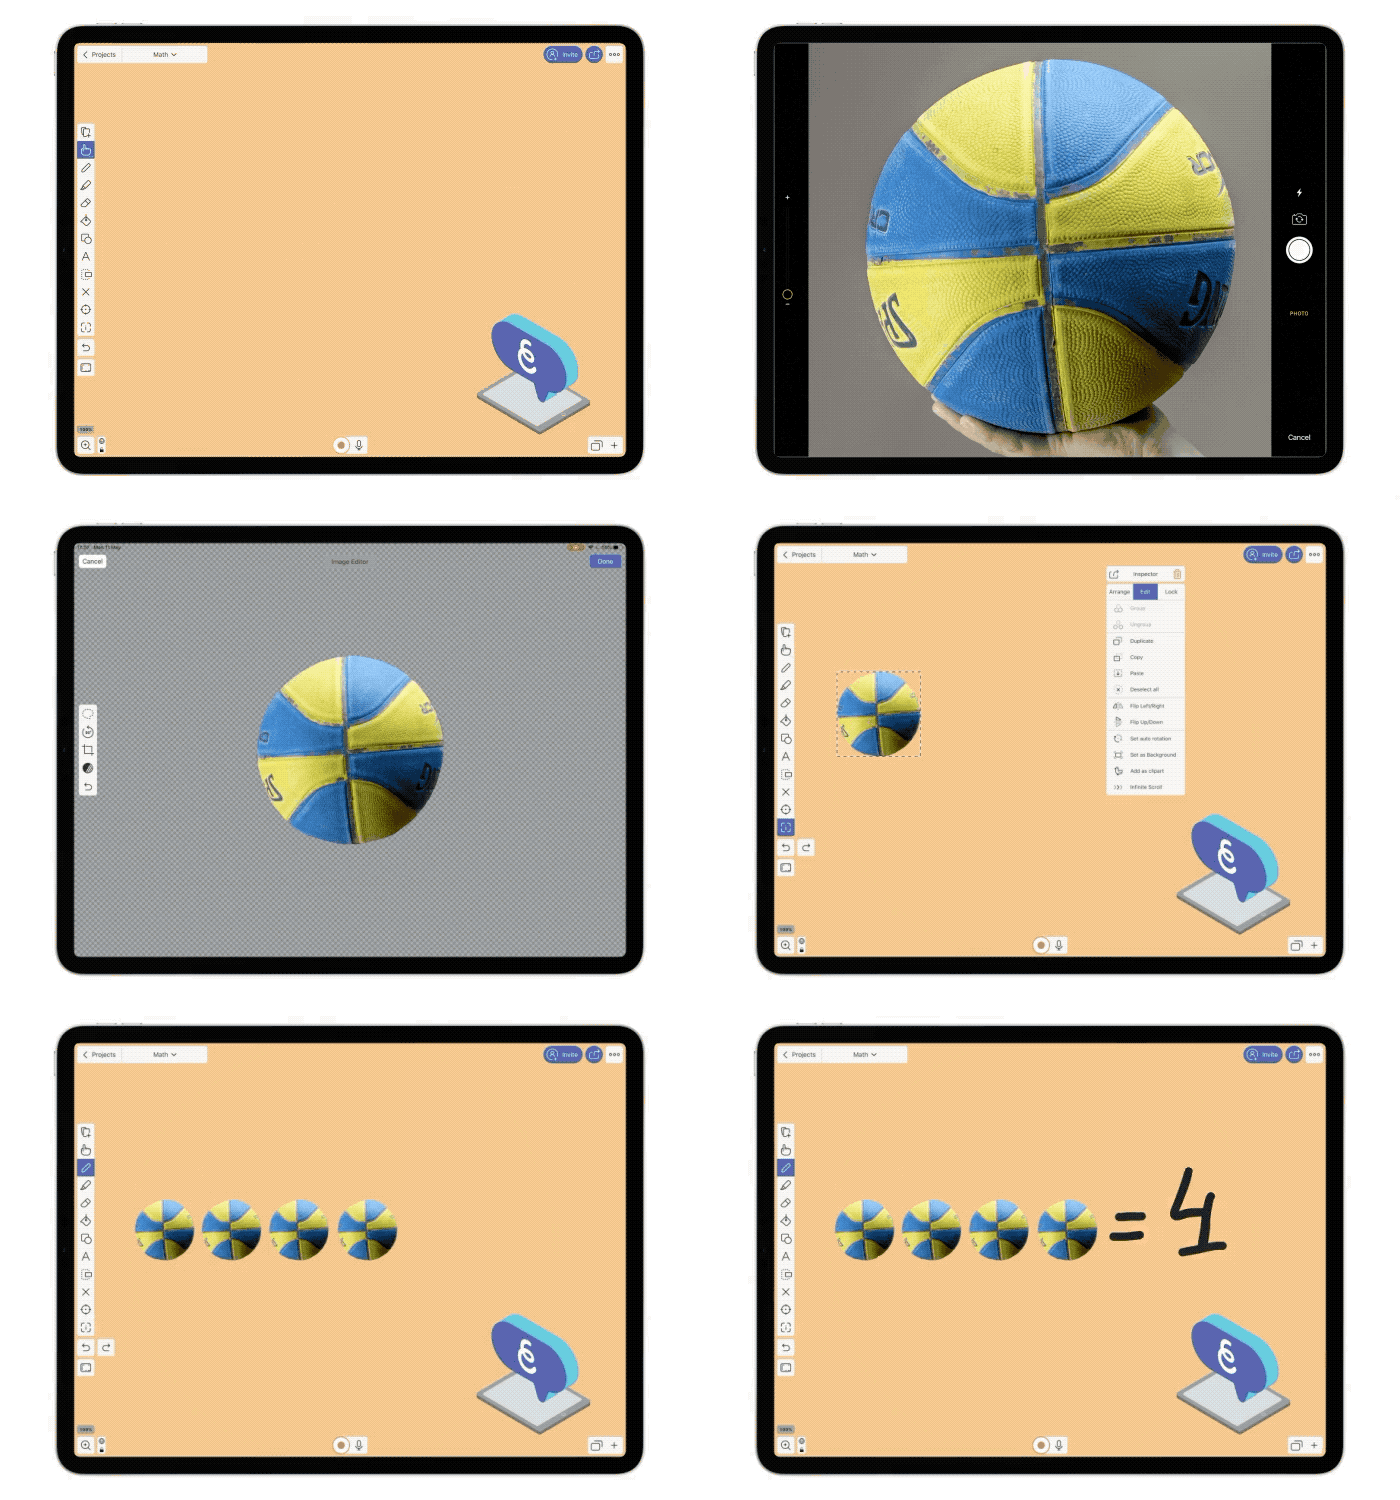
With Explain Everything Whiteboard, you can create first-order representations in 3 simple steps.
Step 1: Tap the Add tool and then Camera to take a picture to use.
Step 2: Take a picture and cut the element you want to use as a representation from the image, then tape Done.
Step 3: Use the Inspector tool to duplicate the element if more instances of it are needed.

Higher-order representations
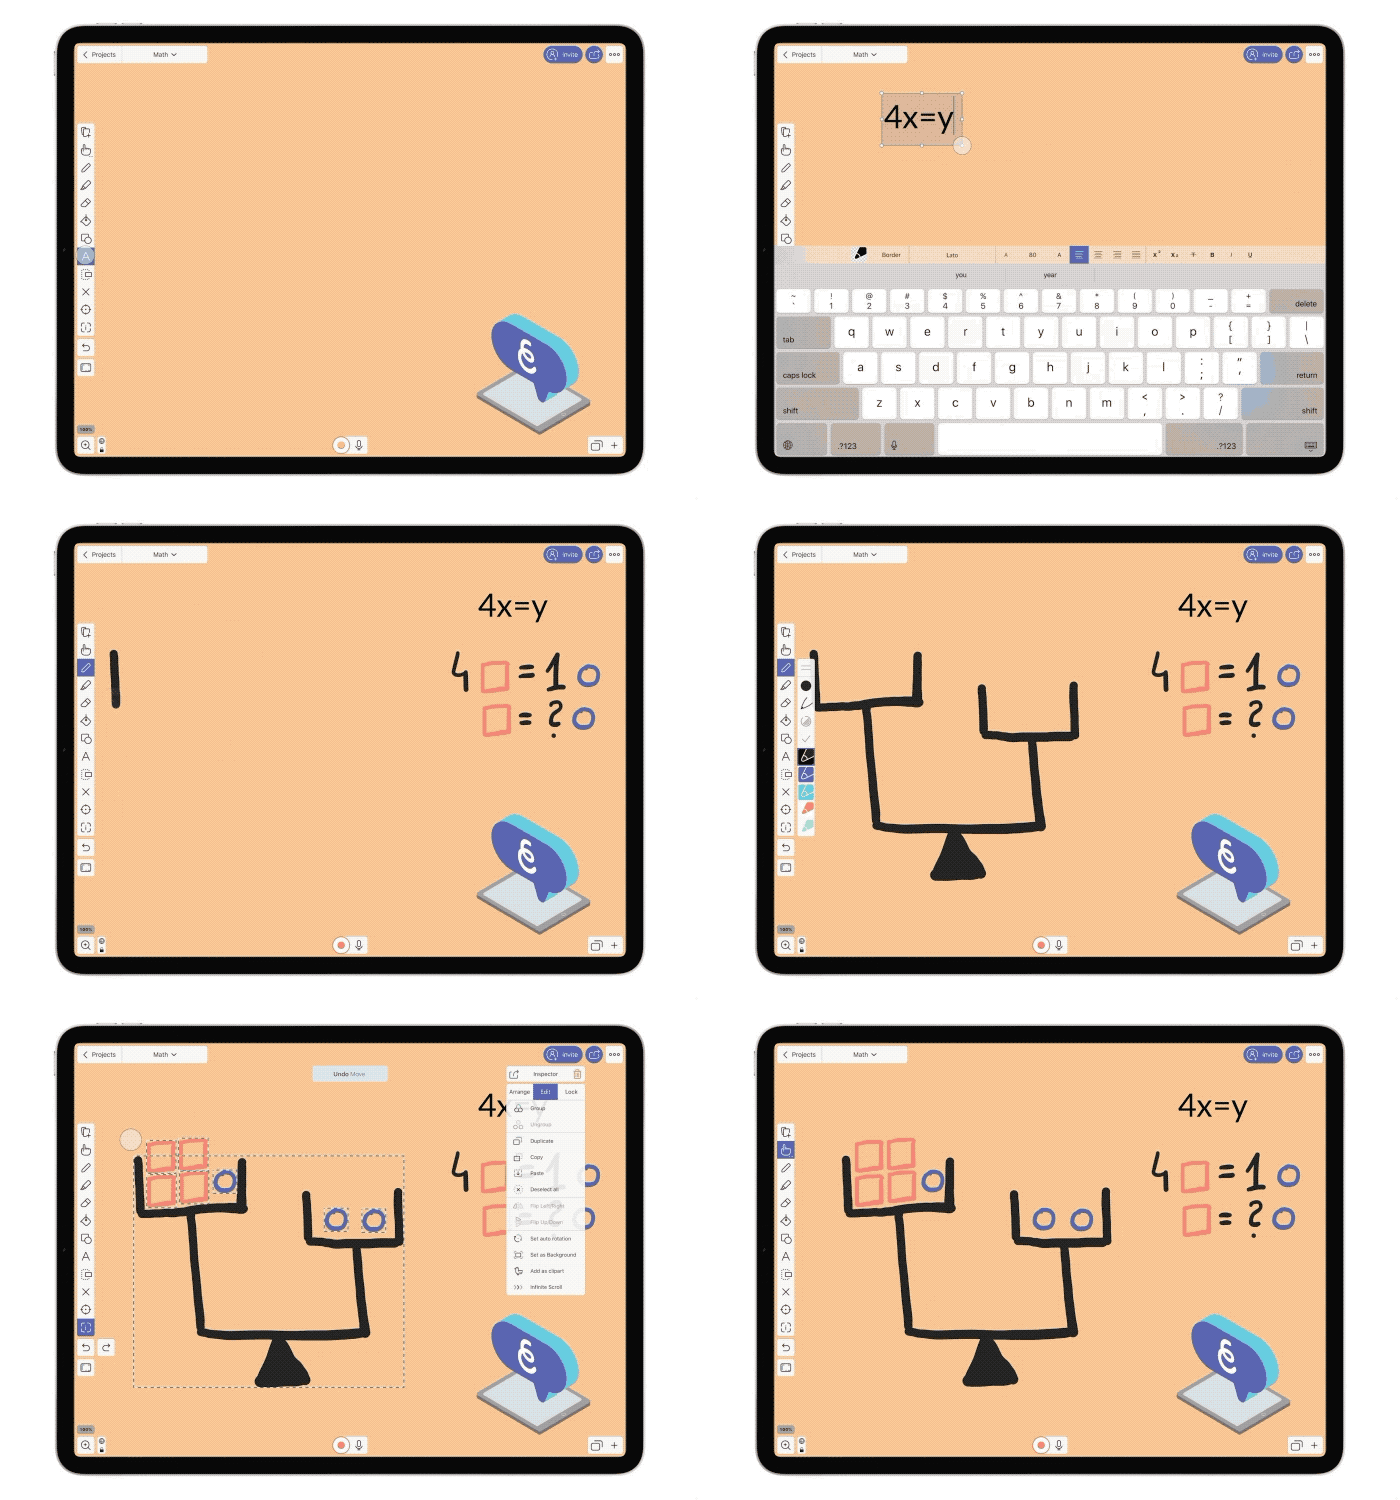
Higher-order representations go beyond simple abstractions, but creating them with Explain Everything Whiteboard is just as easy!
Steps to use higher-order representations:
Step 1: Use the Text tool or Draw tool to add the symbols you need.
Step 2: Each text or drawing is a separate object that can be manipulated! To draw several independent symbols, use a “tick” to separate them.
Step 3: With the Hand tool , you can use each independent object on the canvas. Use the grouping functionality in Inspector to form clusters of related objects.

Steps to open up a whiteboard and explain collaboratively
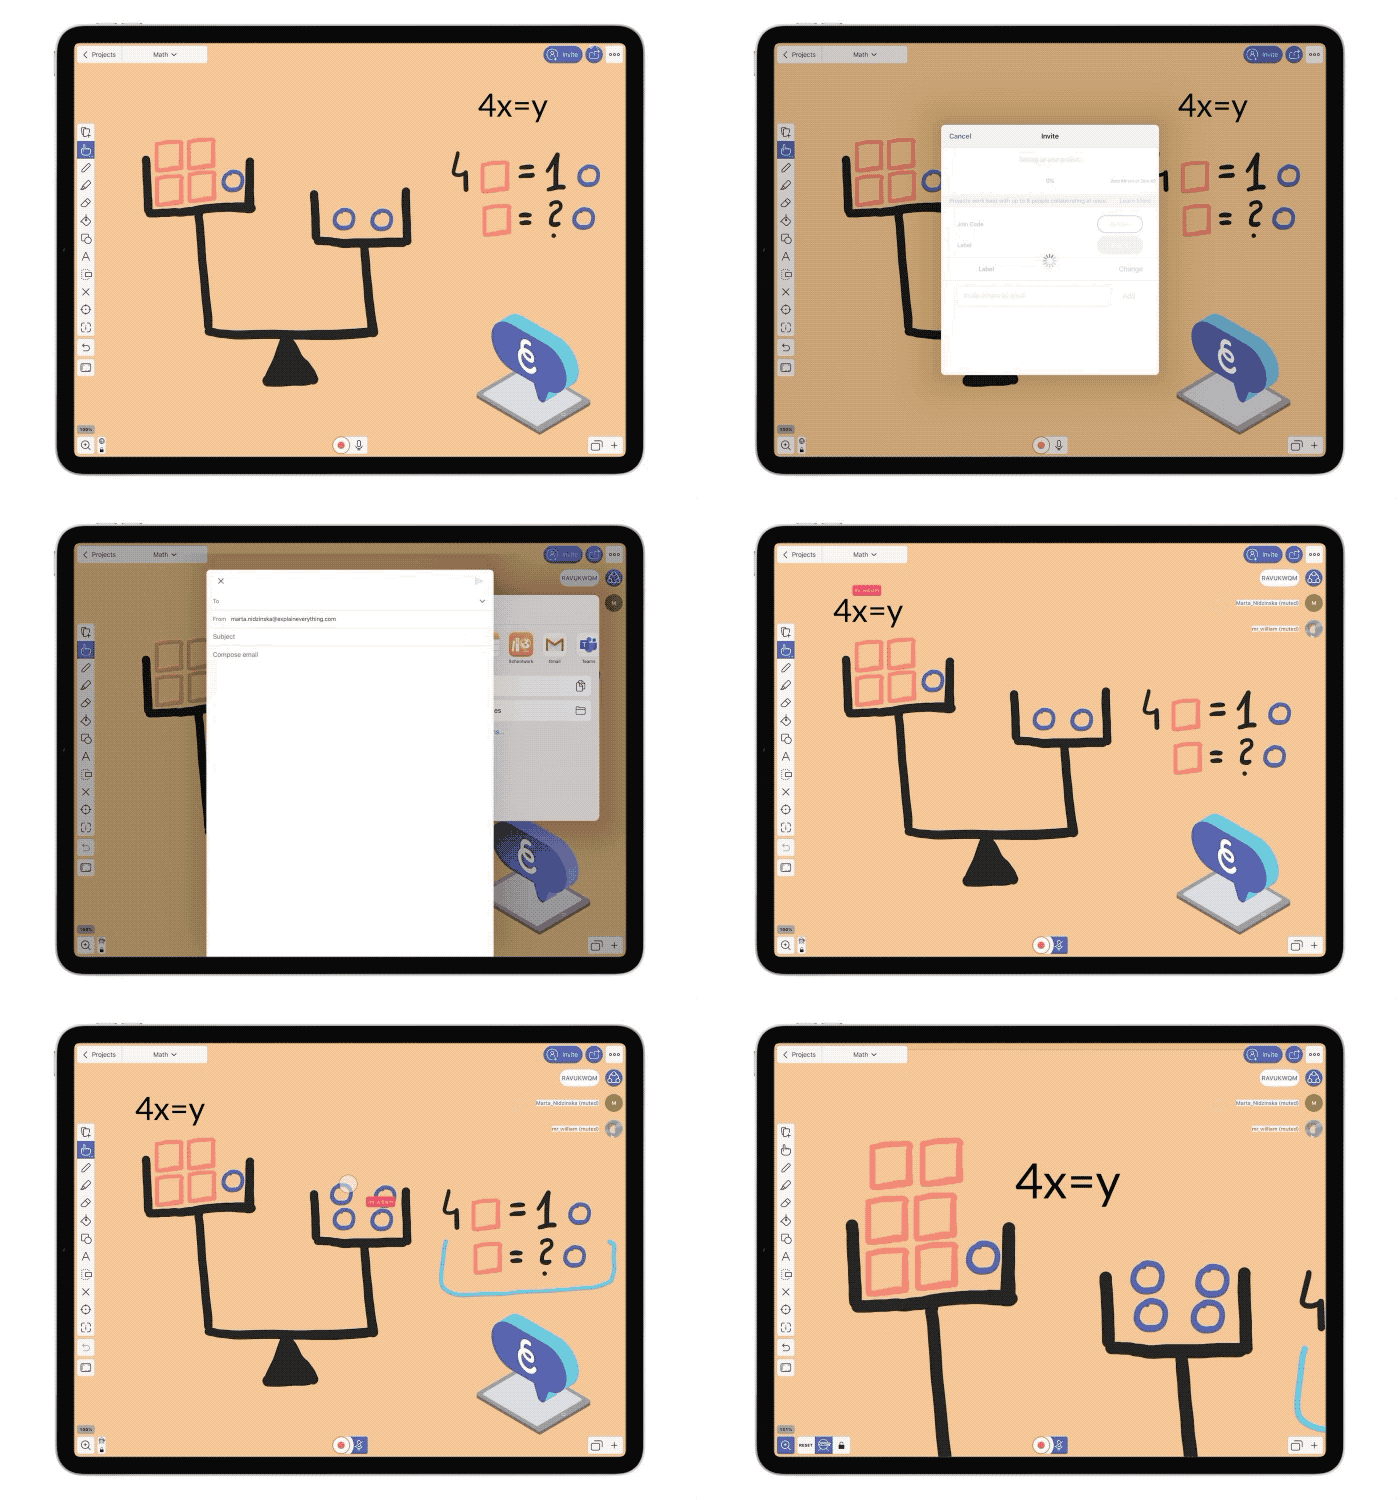
Would you like for your students to take active part in your explanations? No problem, all you have to do is open up collaborative whiteboard project to whiteboard together.
Step 1: Use the Invite button to open up your whiteboard for access.
Step 2: Share your code so others can connect via email or any other communicator you have installed on your device. The code can also be made into a link if you just add expl.ai/ at the beginning of it.
Step 3: Once connected, you can talk with your viewers in real time and use all of the available tools to explain and build understanding.
